Your gear is the most important and the trickiest item to prepare for this hike.
Due to the unstable and sometime rapidly changing weather (ie cold, rain, fog, wind, etc.), you need to make sure you have the appropriate gear. Rather than long explanations, just check the two pictures below:
 |  | |
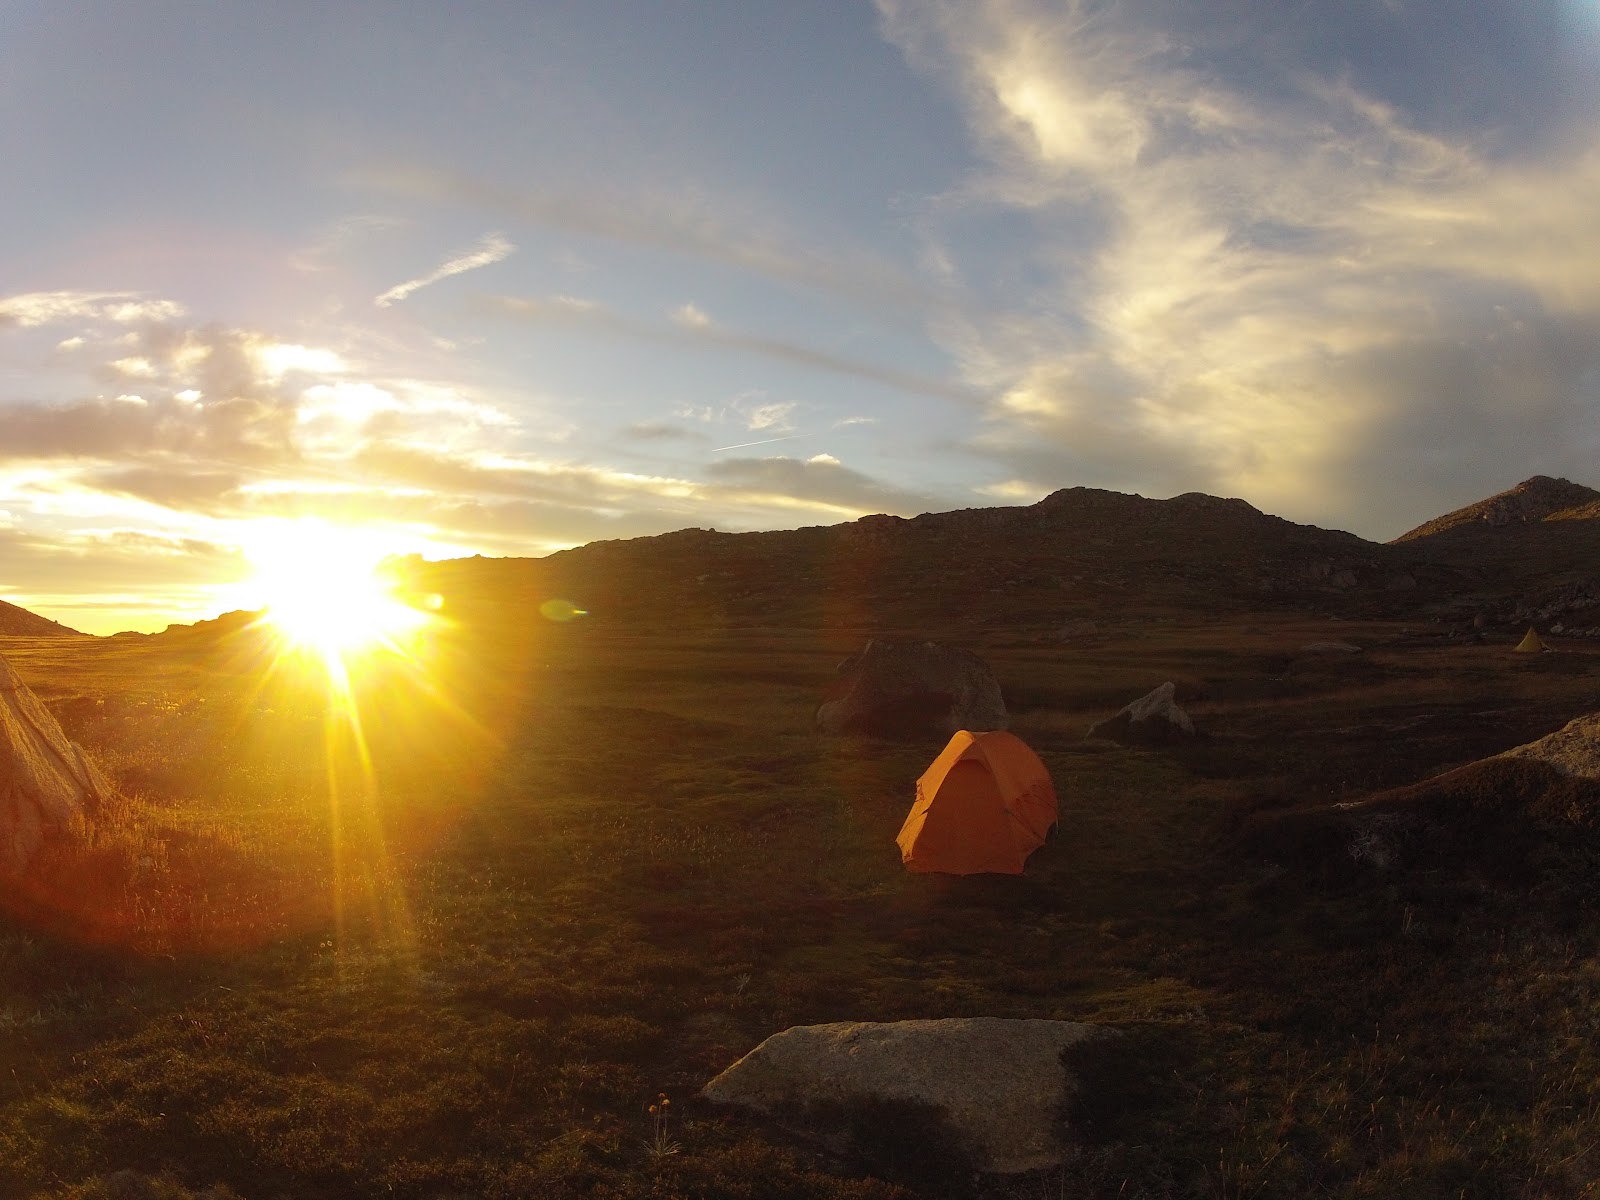
| Start of the track on Saturday | End of the walk on Sunday |
It started super sunny and
finished cold as, raining and foggy. Better be prepared!
To make it easier for you to prepare, I took a
picture of the gear I packed for the weekend:
 |
You can buy most of
the items in your local camping/outdoor store. Most of my gear is
from Kathmandu and was perfect for this adventure.
There are 4 categories
of gear:
As you can see, there is quite a lot of gear to cover. So please use the hyperlinks above to go directly to a specific group or section! - Cargo / Zip-off Pants
- Fleece
- Waterproof / Gore Tex jacket (compulsory)
- Breathable / Sports top
- Socks /Undies
- (Board)short
- Long sleeve thermal top
- Skins / compression gear (optional)
Not shown – hiking boots or trail running shoes
You need to take with
you a Gore-Tex/waterproof jacket in
case it rains or gets cold. The last thing you want is to be caught in the
middle of the walk and suffer hypothermia.
Make sure you pack warm clothes (thermal,
beanie) for evenings and also for cold/rainy/windy
weather and light clothes for sunny weather. Zip-off pants might be a good idea to be used either as pants or
shorts.
At night time, the
temperature drops close to zero; make sure you wear a beanie to stay warm.
Also make sure your shoes
are broken down or you have used them for long walks. I have used trail
running shoes which was fine for the entire trail and great to run up to Mt
Townsend!
Compression gear might be a good idea to accelerate blood flow,
reduce build-up of lactic acid, stay warm and prevent chaffing. To be worn
during or after the walk to recover.
Pack (orange group)
- Big backpack (65L)
- "Camelback" bladder (2L)
- Inflatable mattress
- Tent
- Sleeping bag
- Day pack
A good backpack is paramount. The light daypack will be great after setting
up the camp to go to Mt Townsend with only a few things with you.
The inflatable
mattress will ensure you have a good sleep (especially after a long day trekking!)
and ensure the cold is not transmitted through to your body/back. You do not
need a full body length one, as long as your back is not against cold hard
ground, you are sweet.
An easy to mount and light tent will be best to pitch at the end of the day.
 |
| Camping in the valley |
- Topographic Map – Perisher Valley 85252S ~$9.95 (compulsory) & Wildwalks Notes
- Waterproof map case (optional)
- Compass (compulsory)
- First aid kit (compulsory) (here in waterproof bag)
- Purification tablets (preferable)
- Emergency matches
- Sunscreen (compulsory)
- Sunnies (compulsory)
- Hat / cap (compulsory)
- Insect repellent (preferable)
- Cleaning wipes (preferable)
- Toiletries bag with what you need (contact liquid, etc.)
- Bepanthem (to prevent chaffing)
- Toilet paper
- Trowel
- Head torch
- Camera / GoPro!
Not
shown – Telephone
Not
shown – Towel
Ok lots of critical
items here!
First aid kit, map and compass are compulsory. Protection against the sun as well.
First aid kit, map and compass are compulsory. Protection against the sun as well.
To find out where you
can buy topographical maps close to where you live, click here. I went to Map Worldin Sydney CBD to purchase the map, and was really impressed with their customer
service. Very helpful if you plan on going off-track. Otherwise you can buy a
mini map for ~$5 from the visitors centre in Jindabyne. I also recommend reading/printing/taking the notes from Wildwalks on this trek, they are very useful.
There is plenty of water around but it’s preferable to boil/purify it before drinking. Make
sure you have means to do either. Also you need to be
able to create a fire in case of
emergency, so equip yourself with either a small/light camping stove or
emergency matches.
Bring a telephone. While in many parts of the national park you do
not have coverage and you CANNOT rely on your mobile as an emergency communication
device, I found that on higher grounds with Telstra I had several bars and
could place a call. No idea what the coverage is with other carriers. If you go
alone, it might be worth considering renting an emergency beacon from the visitors centre in Jindabyne.
Cleaning wipes are the bomb for your personal hygiene. They
are cheap, do not take much space and are super refreshing. Again, take your
rubbish with you!
- Metal Pot
- Spork (a combined plastic spoon, fork and knife)
- Leatherman / Swiss Army knife
- Stove (preferably with piezo so you do not need matches to lit it)
- Gas canister
- Dehydrated food (Back country cuisine)
- Snack bars
- Lollies / dried fruits / nuts
- Tins (soup / bakes beans / tuna)
- Cup
- Tea bags / Instant Coffee
- Rubbish bags (compulsory)
Based on my
experience with this weekend trek, just get snacks, a medium pot and dehydrated food. The metallic pot will
be good to boil enough water for your meal and to fill a water bottle.
Tins are cheap but
bulky and heavy to carry, and after eating them, they are messy/sharp and still take a lot of space. Sandwiches might be a cheap option but it might be difficult to find time making them, keeping them from being squashed in the pack and staying fresh with the heat!
Dehydrated food is a bit more expensive, but just boil water,
put it in the bag, wait a few minutes and you can then directly eat it from the
bag (so no dishwashing!). I was happily surprised to see that it’s pretty good (though after a long
day walking any warm food would be considered good ;). It is light to carry
before and after eating it and it does not take much space. Your back will
thank you.
As usual, take
your rubbish with you!
Let me know if you found the above pictures and tips helpful and in the next post, we will see pictures and videos of the actual walk.
Let me know if you found the above pictures and tips helpful and in the next post, we will see pictures and videos of the actual walk.
Hot tip - don't have all your gear hanging off you pack like that!
ReplyDeleteThanks for the hot tip! Would you mind expanding on the reason(s) why? I am sure people would get value from this.
DeleteOkay, rather than just being a smart a*%e and telling you what to do, I should just explain why ;)
ReplyDeleteHaving your tent hanging off your pack like that puts it in a prime position to put a hole in it - not ideal! Also, having it hang below your hips where it is will make your whole pack heavier to carry. It would be better to have it closer to your back and inside your back. And generally having things off your pack means they might fall off - better that you don't lose your stuff.
An easy solution for this is to pack better. Failing that, get a larger pack :p
https://www.facebook.com/HelpFindPrabhSrawn
DeleteThanks for the explanations mate! Learning everyday!
ReplyDeleteI have done some more research on how to best pack a backpack following your comments and have found some great material.
I will post them on this article shortly. Thanks again!
https://www.facebook.com/HelpFindPrabhSrawn
Deletehttps://www.facebook.com/HelpFindPrabhSrawn
ReplyDelete